Draw Leaf Table Plans Free
Difficulty
Intermediate
| 
How to build a drop foliage storage table with free, simple, step by step plans from Ana-White.com
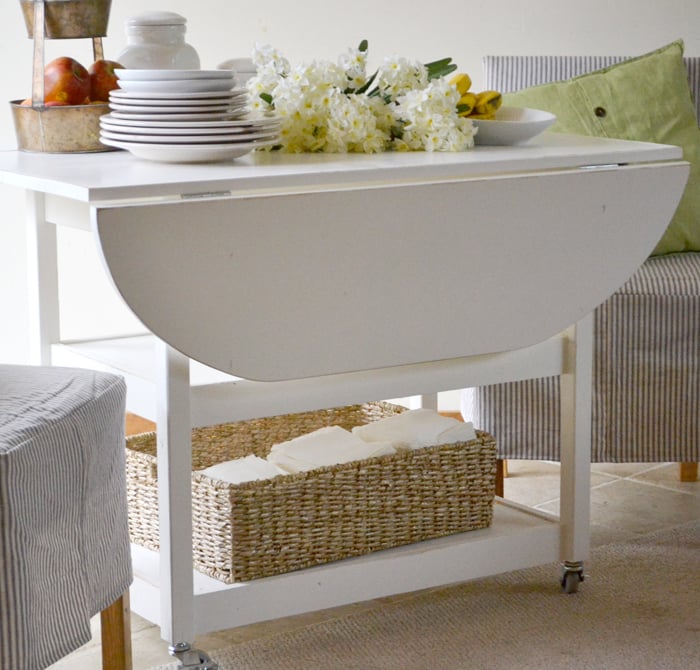
Adept luck building your ain drib leafage storage tabular array and delight share photos with usa when you lot are washed! Tin't wait to see!
For years now, I've been wanting to brand this table.
Information technology's inspired by the Pottery Barn Shayne Tabular array, merely mine is a fiddling smaller to fit my smaller space, and also optimized for lumber cuts. And I put pulley wheels on mine.
Yous see, nosotros have this itty fragmentary dining room - which is just right for my itty bitty family of three. But our family of three can expand exponentially with i relative popping in to say hello and ending up staying for dinner. This happens quite often.

With this new tabular array, we tin go from seating for a few ...

To seating for quite a few more

By just pulling the leafage upwards.

And and then it'southward quick and easy to go dorsum to the small tabular array that is much easier to walk around.

I don't know why I've waited and then long to build this table. One time I drew the plans upward and started working, it was merely a few hours to build information technology! And using leftover 1x16s from my closet, the total cost of this project was most $fifty!
Here's a breakdown of costs
2 - 1x12 @ 8 feet long - $24
two - 2x2 @ 8 feet long $4
2 - 1x3 @ viii anxiety long $3
1 - 1x4 @ 8 feet long $5
Ready of iv 2" caster wheels - $4
2 - Sets Drop Leaf Tabular array Supports - $7
2 - Sets Basic Hinges - $2
$50 bucks! Beat that with a stick ... uh, I mean board!!!!
Savour the plans!
Dimensions
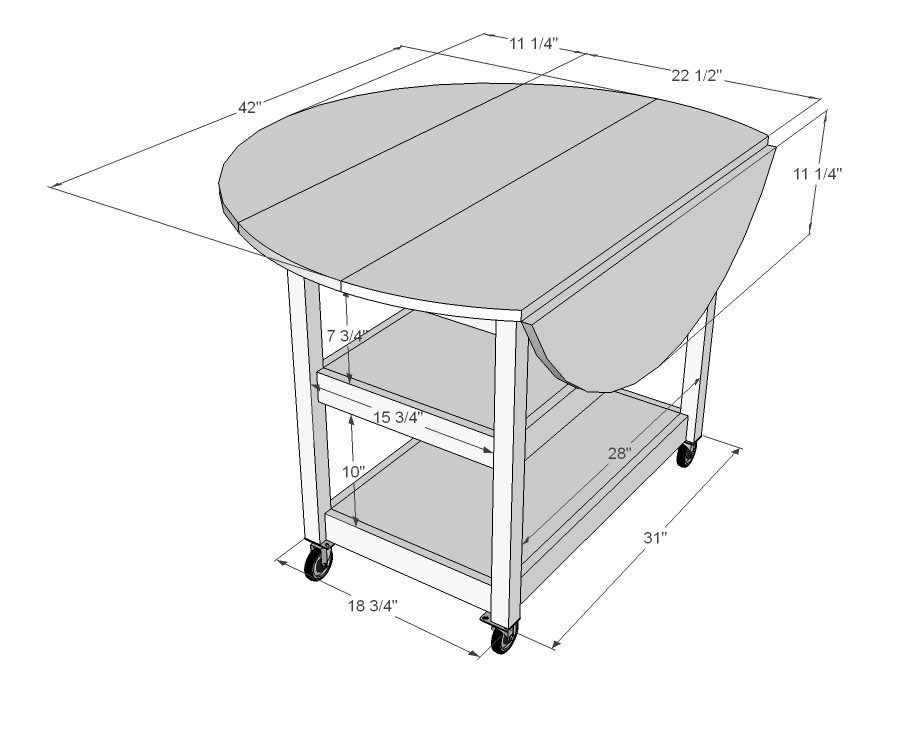
Dimensions shown above.
Preparation
Shopping Listing
2 – 2x2 @ 8 feet long
ane – 1x4 @ 8 anxiety long
2 – 1x3 @ 8 anxiety long
2 – 1x12 @ 8 anxiety long
1 – ½ sheet ¾" plywood
2 - sets of basic hinges
2 - Driblet Leaf Back up 8 inch Pair
4 - 2" pulley wheels
Cut List
iv – 2x2 @ 26 ¼"
2 – 1x4 @ 15 ¾"
4 – 1x3 @ xv ¾"
2 – ¾" Plywood 15 ¾" x 28"
2 – 1x4 @ 28"
iv – 1x3 @ 28"
4 – 1x12 @ 42"

Full general Instructions
Delight read through the entire plan and all comments earlier start this projection. It is also advisable to review the Getting Started Section. Accept all necessary precautions to build safely and smartly. Work on a clean level surface, costless of imperfections or debris. Always use directly boards. Check for square after each step. Always predrill holes before attaching with screws. Apply glue with finish nails for a stronger hold. Wipe excess glue off blank wood for stained projects, equally dried gum will not have stain. Be condom, accept fun, and ask for assistance if you demand information technology. Skillful luck!
Instructions
Step i
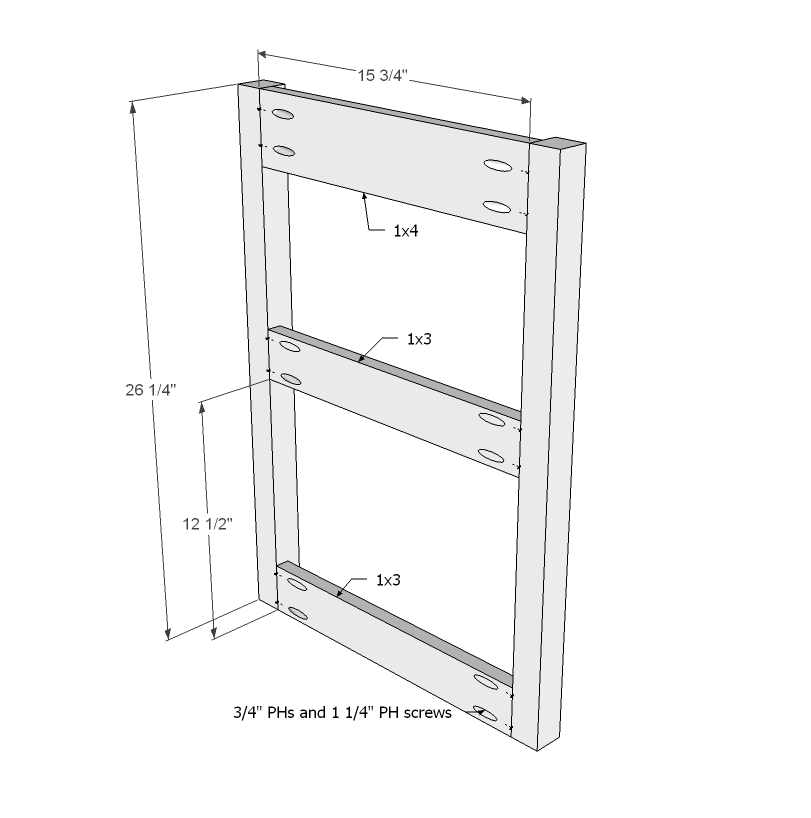
Beginning by building ii ends. Super piece of cake. Keep the insides affluent, hiding the iii/iv" pocket holes to insides, and joining with i 1/4" pocket hole screws and gum.
TIP: Drill 3/4" pocket holes facing upwardly on insides of top aprons for subsequently attaching your tabletop.
Stride 2
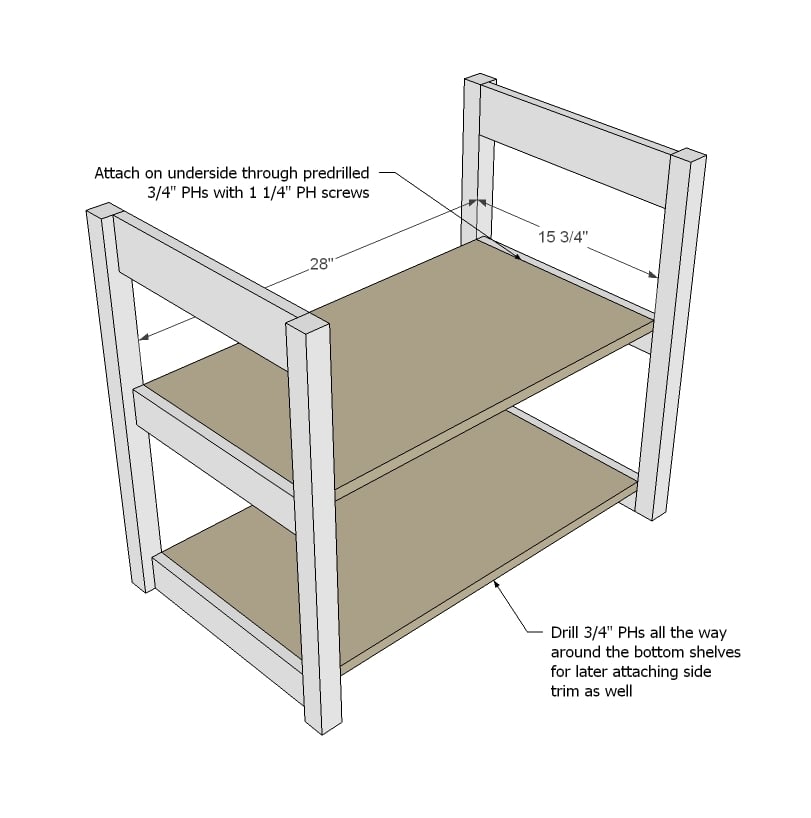
Drill 3/four" pocket holes all the way around both shelves. Attach to legs as shown in diagram.
Step 3
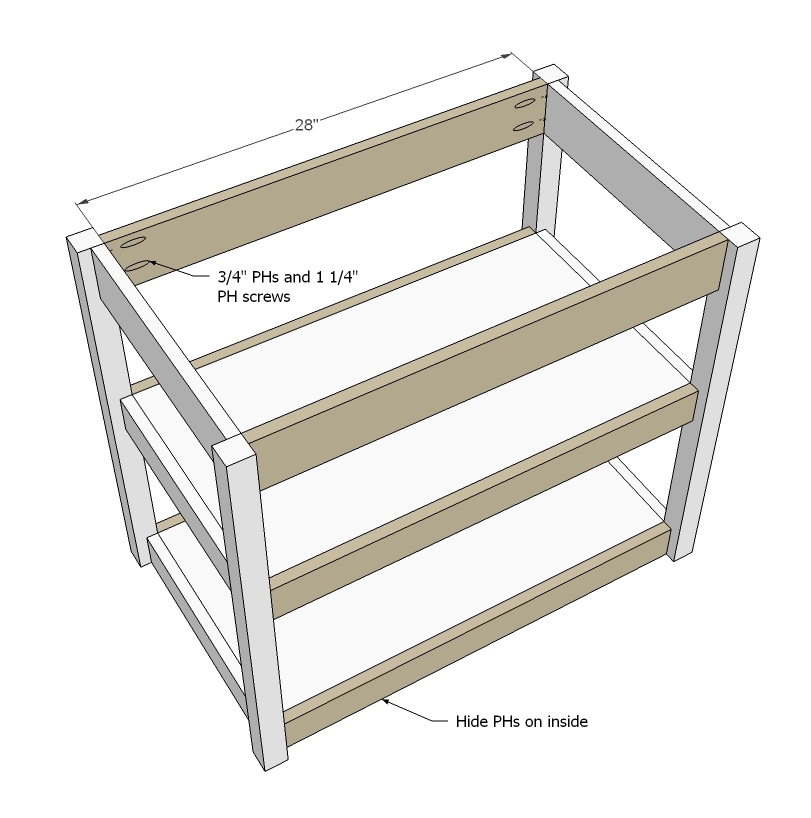
Then add together your side trim with 3/four" PHs and one 1/4" PH screws, attaching the shelves also to the corresponding trim.
TIP: Drill 3/4" pocket holes facing upward on insides of top aprons before attaching to table for subsequently attaching your tabletop.
Step 4
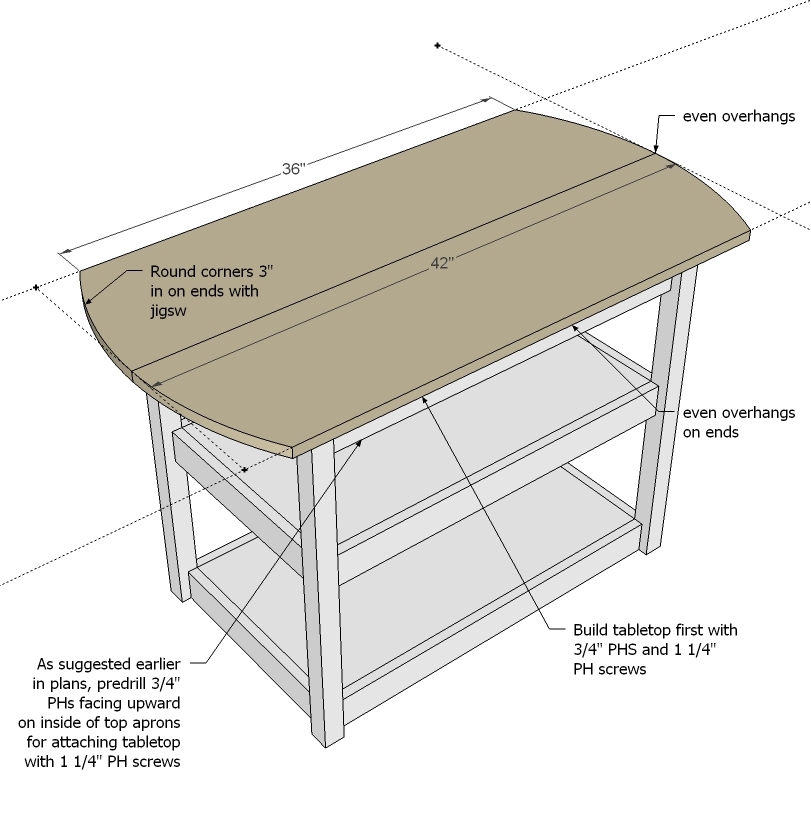
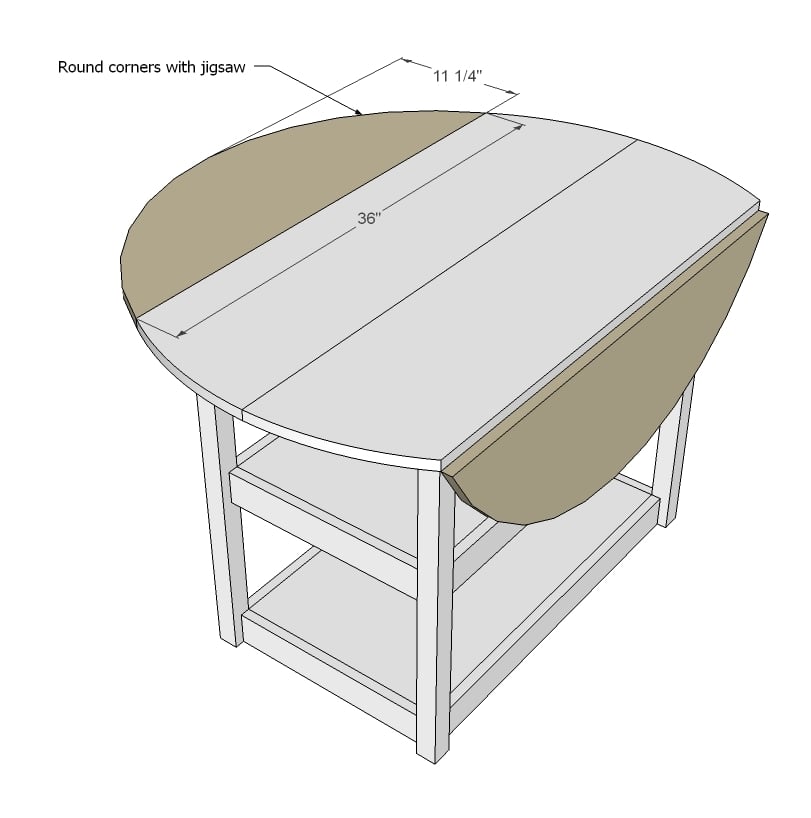
What I actually did hither was build my tabletop with a row of 3/4" pocket holes/ 1 1/iv" pocket hole screws down the center (and glue) and fastened to tabletop. Then I attached the 2 leaves, and then the tabletop is a giant square. Then I drew out the arch shape I liked and cut with a jigsaw.
Here's a video on cutting arches with a jigsaw. Only be very careful to make sure your jigsaw blade isn't beveling every bit it cuts the wood, and go deadening. Use a very abrupt, appropriate blade. And remember, you tin can ever take more woods off subsequently! Practice, do!
Pace five
Pace 6
Footstep vii
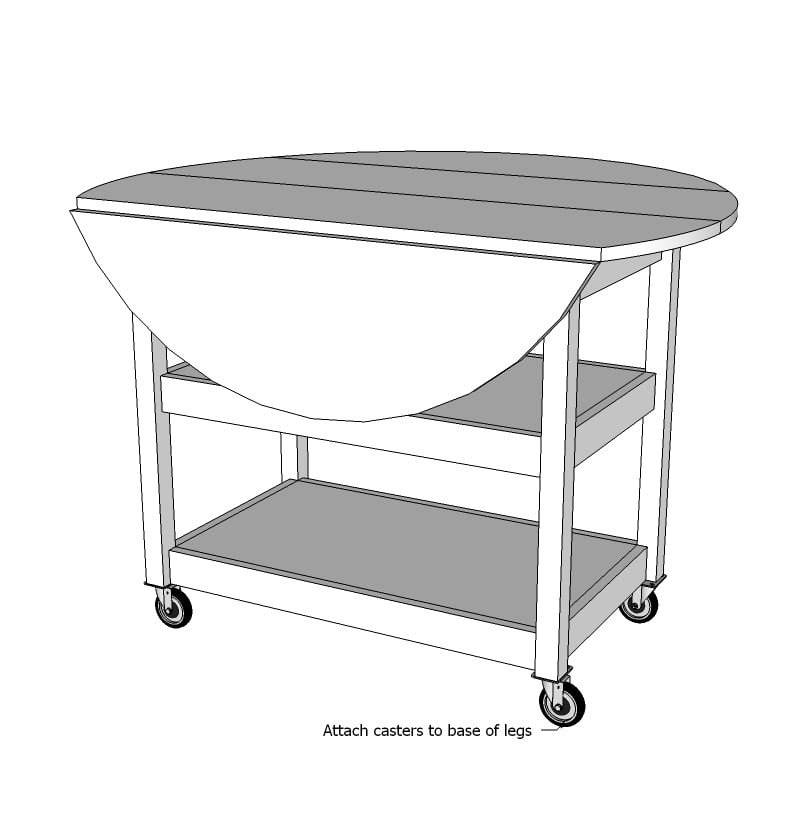
Add together the caster wheels to lesser. I actually did the bolt kind - but a word of circumspection - I did have some trouble with my caster wheel bolt colliding with the pocket hole screws from the bottom shelf trim, and then you may want to opt for the plate kind instead.
Step viii
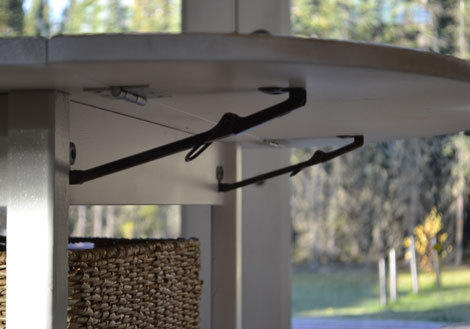
And we waited two weeks for these to come in the mail and they were worth it! They are called Drop Leaf Support viii inch Pair and no, they are non stone solid, merely they are enough sturdy for our purposes and install in seconds! I recommend installing them most half way down the table apron - you may need to exercise a petty trial and error to become things simply right.
Preparation Instructions
Fill up all holes with wood filler and permit dry out. Apply additional coats of woods filler equally needed. When woods filler is completely dry, sand the projection in the direction of the wood grain with 120 dust sandpaper. Vacuum sanded project to remove sanding balance. Remove all sanding residue on work surfaces as well. Wipe project clean with damp cloth.
Information technology is ever recommended to apply a test glaze on a subconscious area or scrap piece to ensure color evenness and adhesion. Use primer or wood conditioner as needed.
Source: https://www.ana-white.com/woodworking-projects/drop-leaf-round-storage-table